
A Step-by-Step Guide to Setting Up Streaming Infrastructure
Streaming to multiple platforms like YouTube, Twitch, or Rumble can be challenging and costly when relying on third-party restreaming services. Luckily, with open source software like NGINX with the RTMP module, you can easily self-host a lightweight restream server on your local machine. This approach gives you full control over your stream, keeps costs down, and helps you learn how streaming infrastructure works under the hood.
In this beginner-friendly tutorial, I will walk you through:
- What is NGINX with RTMP module?
- Why self-host your restream server?
- How to set it up using OBS and Podman (or Podman-Compose)
- How to start streaming from your computer to multiple platforms
What is NGINX with RTMP Module?
NGINX is a powerful, open source web server known for its speed and reliability. The RTMP module adds real-time messaging protocol (RTMP) support to NGINX, allowing it to accept live video streams and forward (restream) them to multiple destinations.
This setup is very lightweight compared to full restreaming services because it simply forwards your live stream to platforms like YouTube and Rumble, without transcoding. It is ideal for people with limited hardware resources who want to restream from home.
Why Self-Host Your Restream Server?
- Open Source: You are in control of the software and data.
- Cost-effective: No monthly fees or subscriptions.
- Customizable: You can tailor your streaming setup to your needs.
- Learning: Gain valuable knowledge about streaming technology and server management.
How to Set Up NGINX with RTMP Module for Local Restreaming
Requirements
- A computer with a modern CPU (an i7 or equivalent recommended)
- OBS Studio installed for capturing your stream
- Podman and podman-compose installed for container management
- Stream keys for your target platforms like YouTube and Rumble
Step 1: Create Your Project Folder
Create a folder named nginx-rtmp on your PC and place the following files inside it:
Dockerfile– to build NGINX with RTMP supportnginx.conf– configuration file to specify streaming behaviorpodman-compose.yml– to run the container easily
Step 2: Sample Files
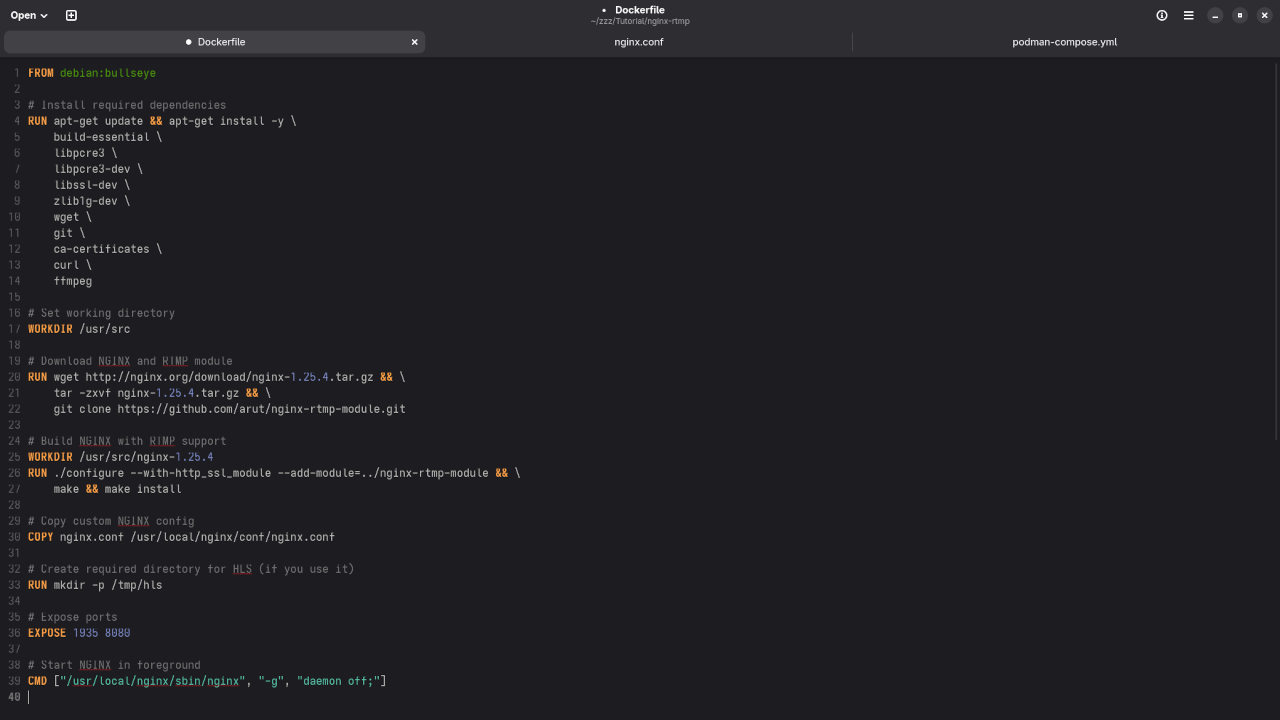
Dockerfile
FROM nginx:alpine
RUN apk add --no-cache nginx-mod-rtmp
COPY nginx.conf /etc/nginx/nginx.conf nginx.conf
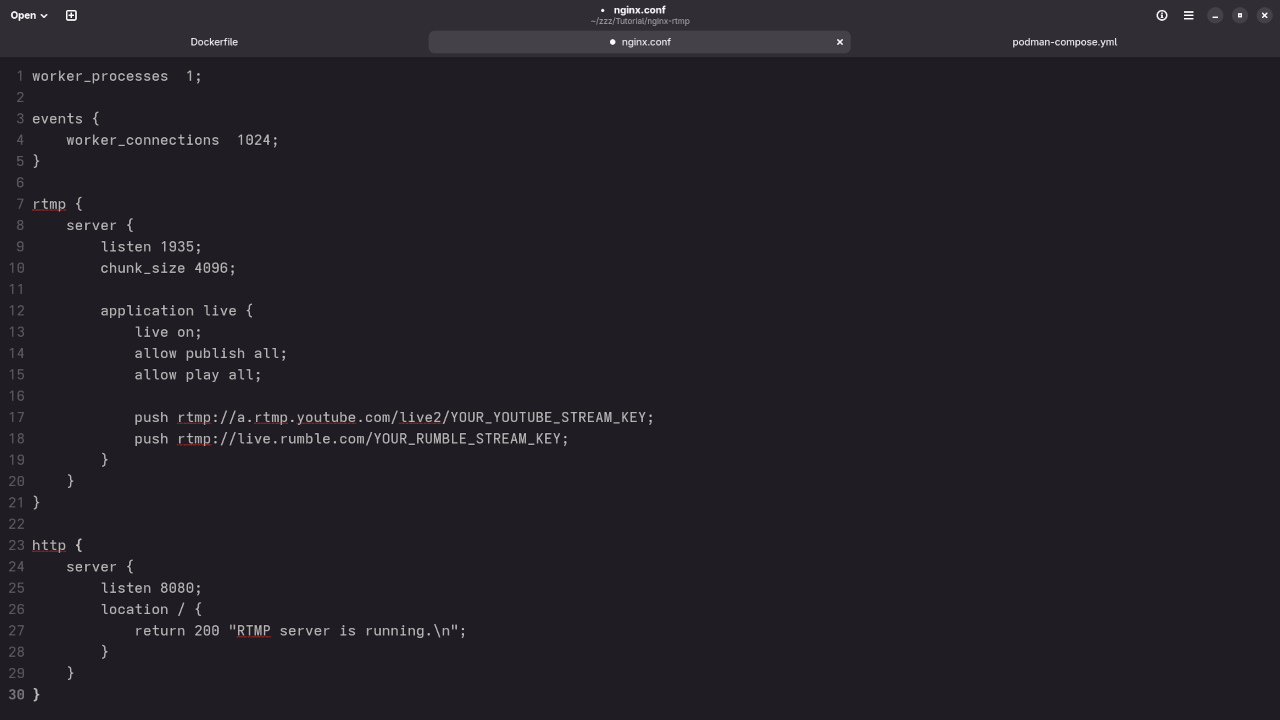
worker_processes 1;
events {
worker_connections 1024;
}
rtmp {
server {
listen 1935;
chunk_size 4096;
application live {
live on;
allow publish all;
allow play all;
push rtmp://a.rtmp.youtube.com/live2/YOUR_YOUTUBE_STREAM_KEY;
push rtmp://live.rumble.com/YOUR_RUMBLE_STREAM_KEY;
}
}
}
http {
server {
listen 8080;
location / {
return 200 "RTMP server is running.\n";
}
}
} Replace YOUR_YOUTUBE_STREAM_KEY and YOUR_RUMBLE_STREAM_KEY with your actual keys.
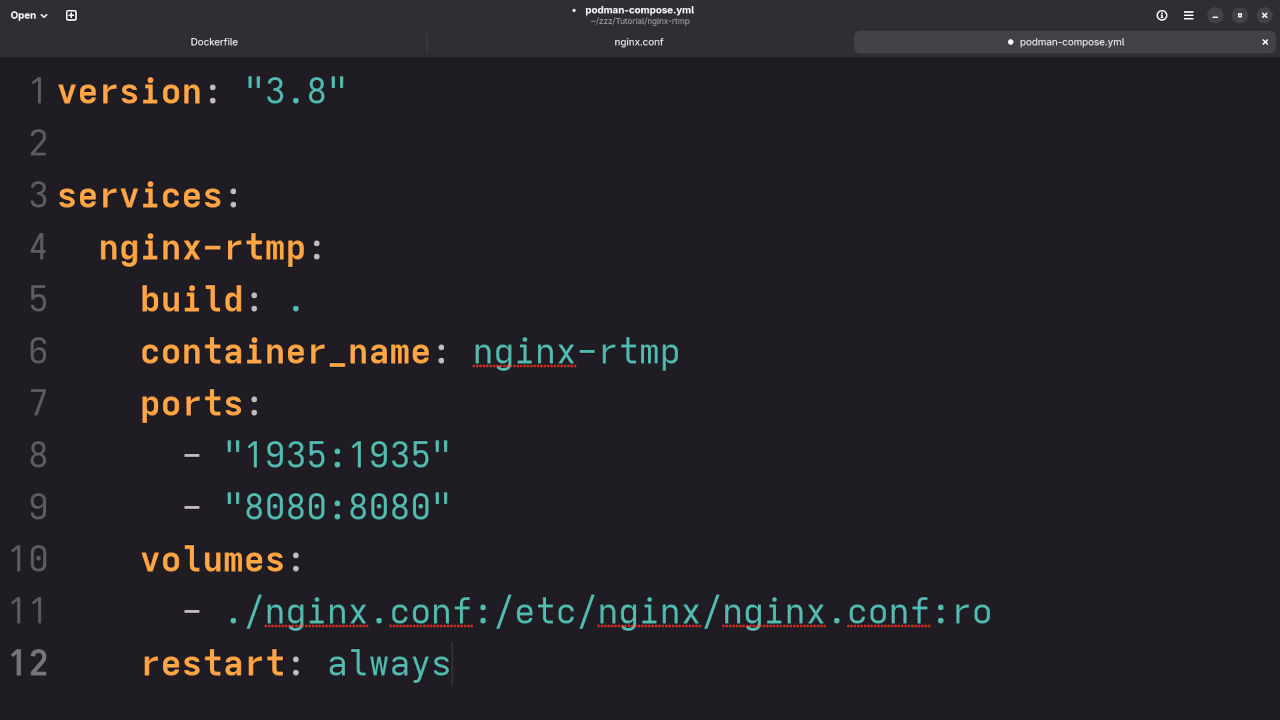
podman-compose.yml
version: "3.8"
services:
nginx-rtmp:
build: .
container_name: nginx-rtmp
ports:
- "1935:1935"
- "8080:8080"
volumes:
- ./nginx.conf:/etc/nginx/nginx.conf:ro
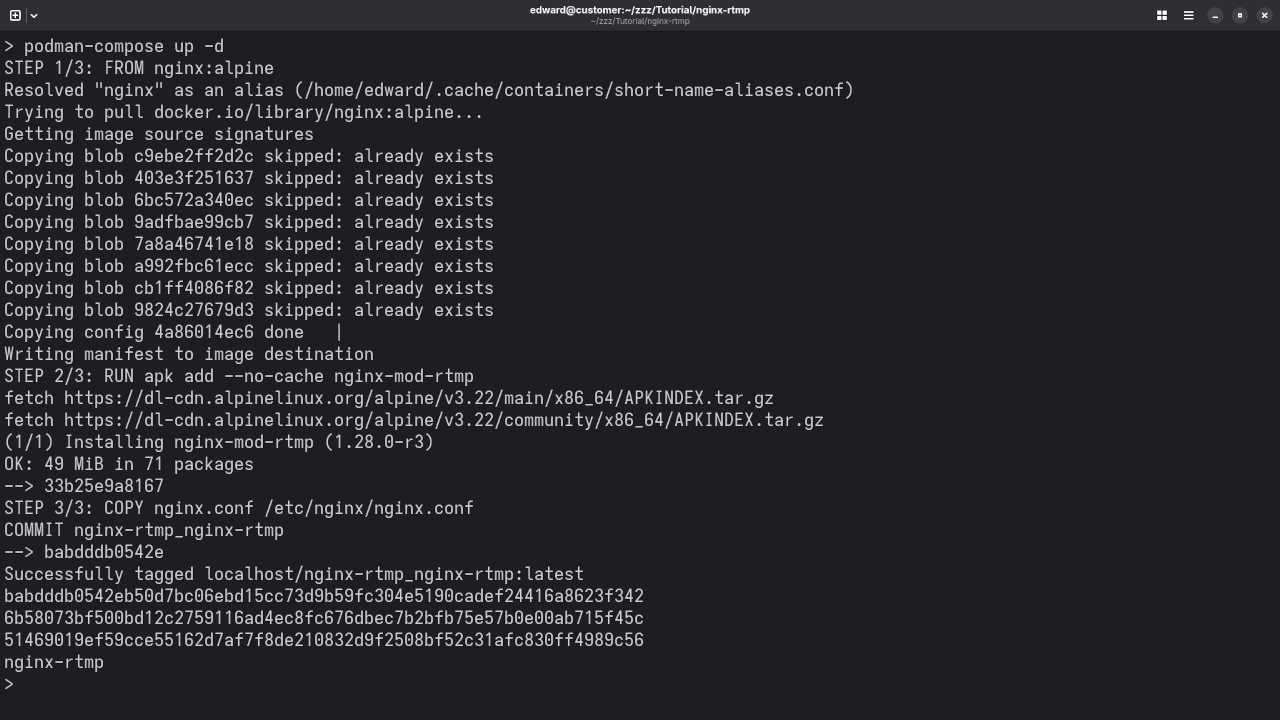
restart: always Step 3: Run the Container
Open a terminal in the nginx-rtmp folder and run:
podman-compose up -d This will build and start your NGINX RTMP server container.
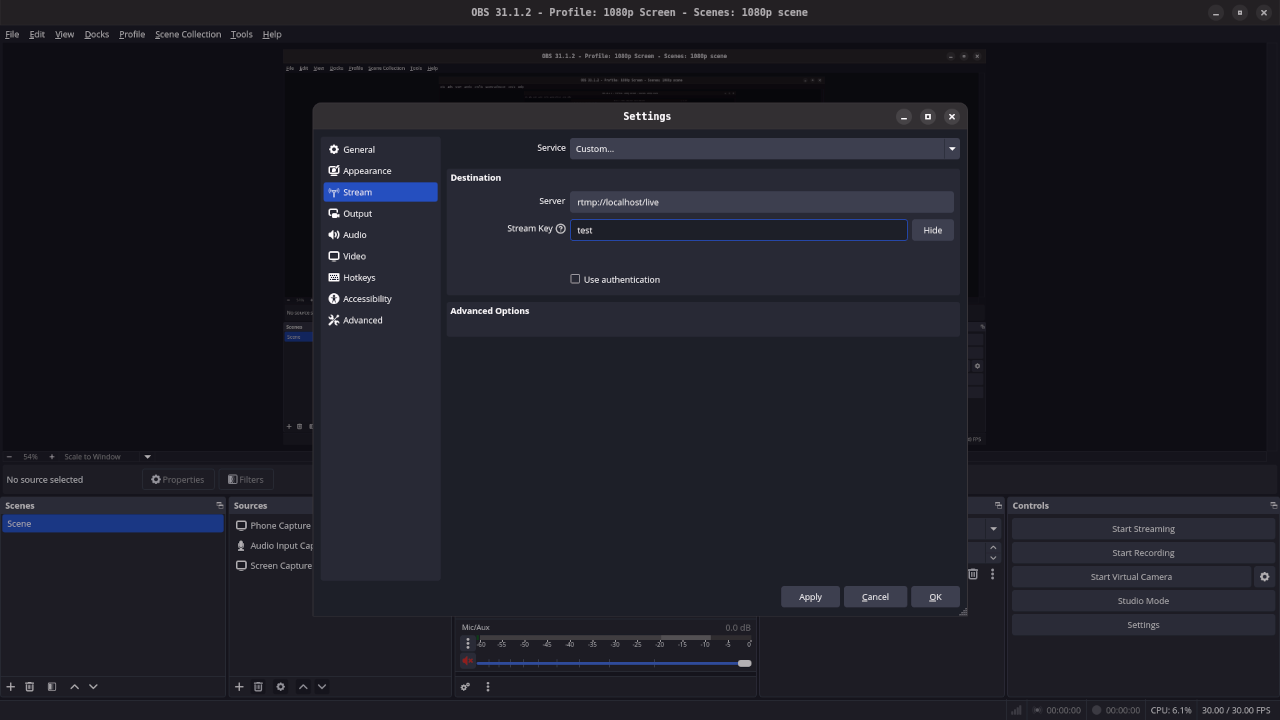
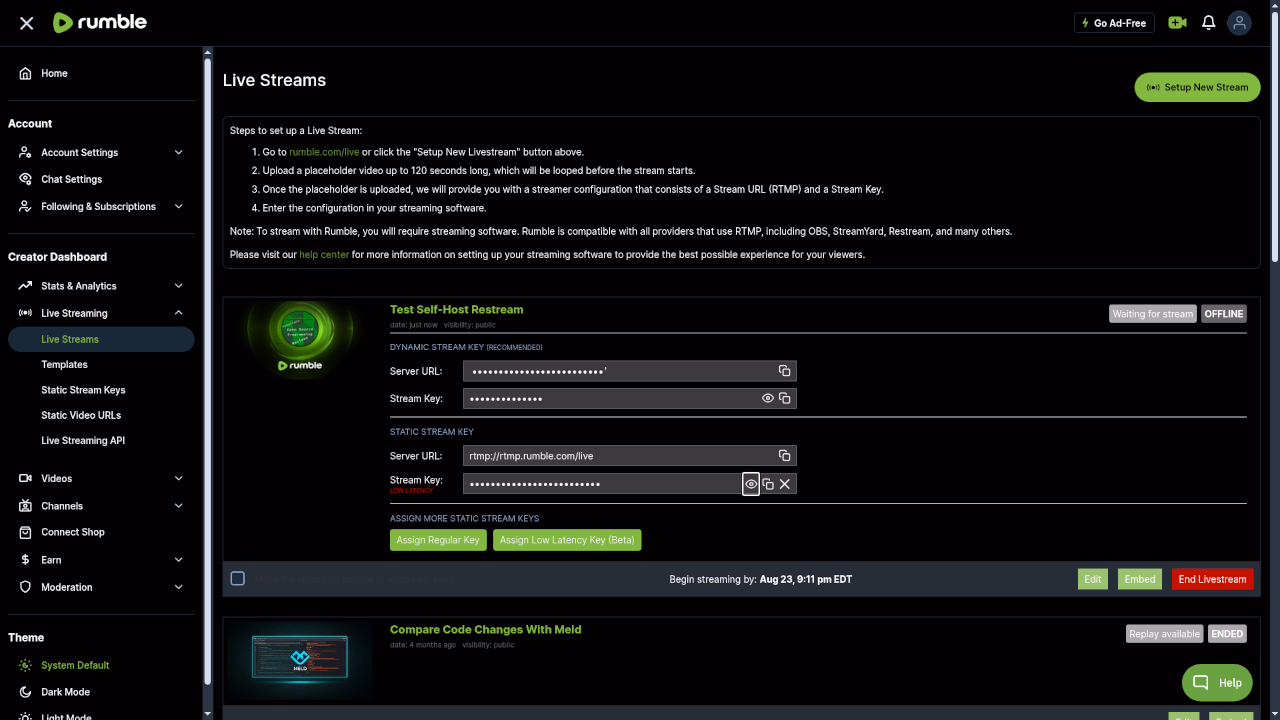
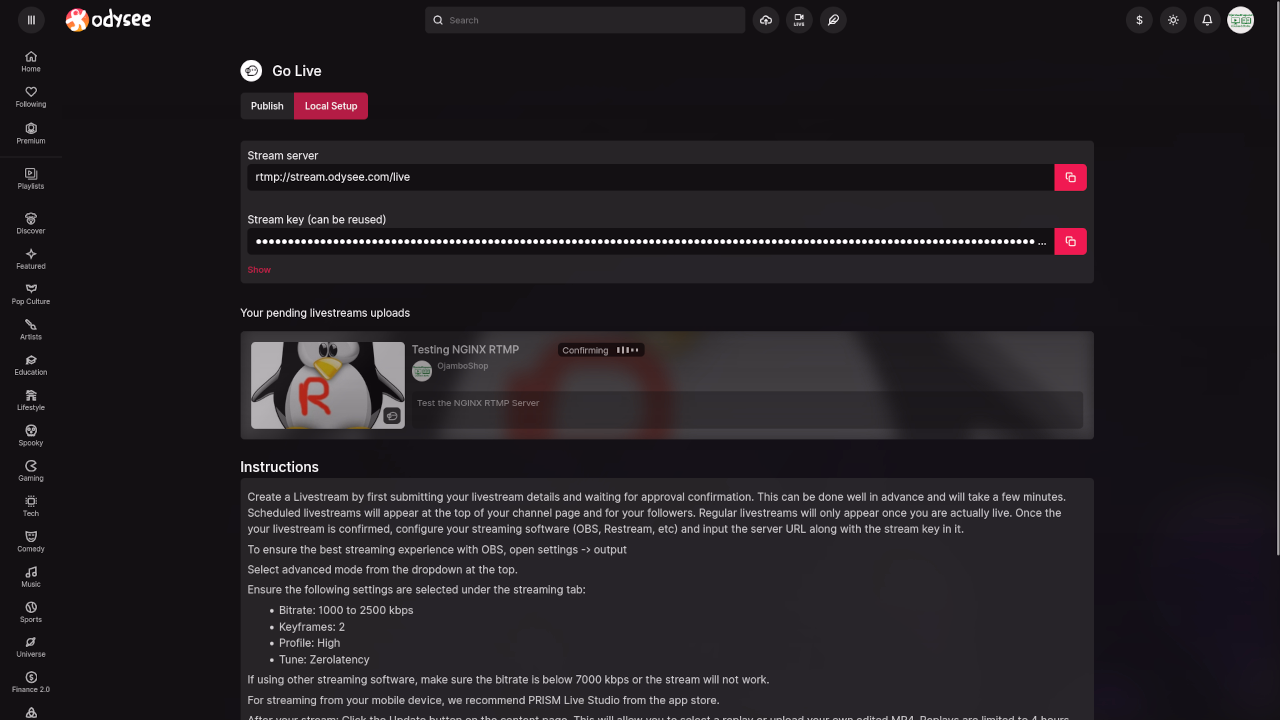
Step 4: Configure OBS Studio
- Set your stream Server URL to:
rtmp://localhost/live - Use any Stream Key (for example,
test).
Start streaming in OBS – your server will forward your stream to YouTube and Rumble automatically.
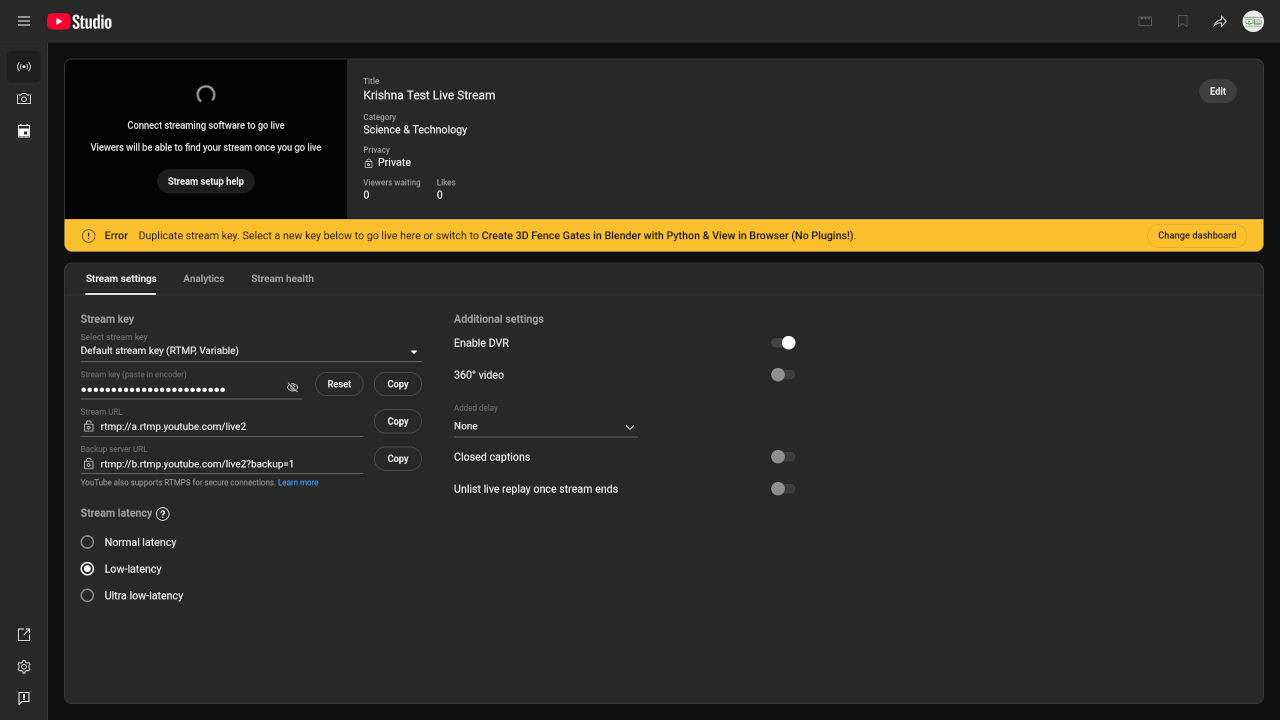
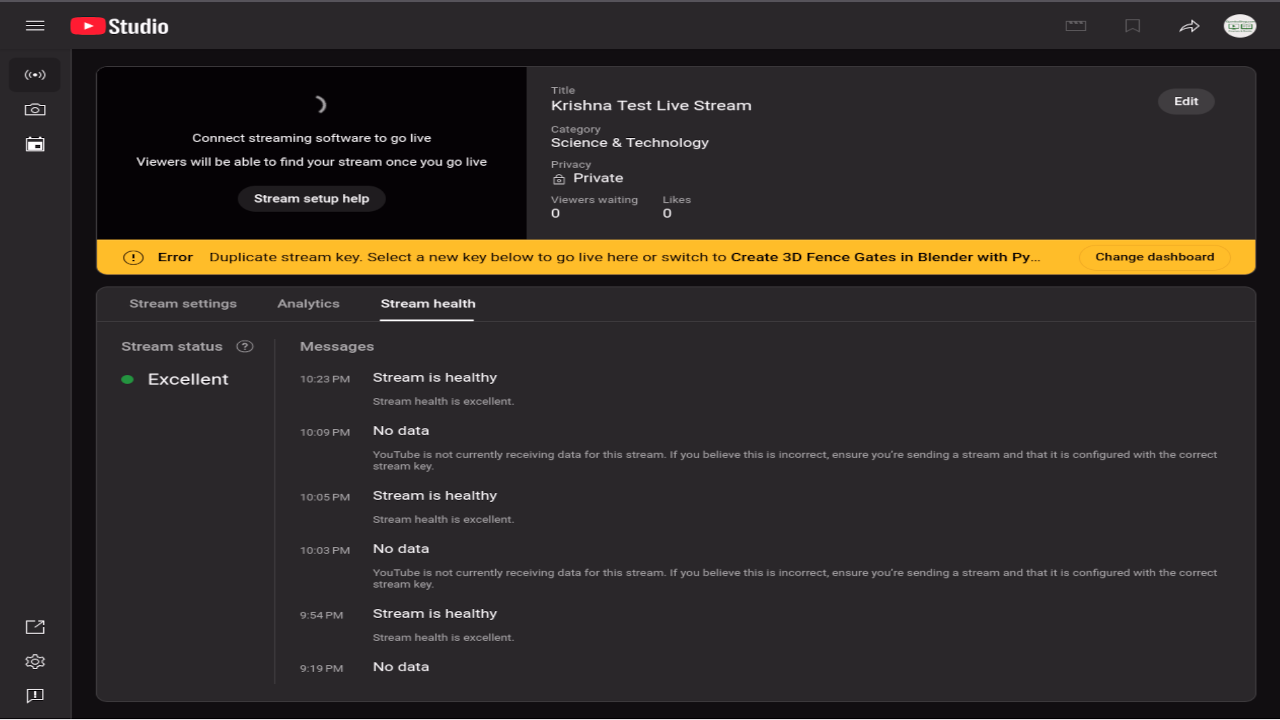
Screenshots and Screencast
Need Help or Personalized Support?
If you want one-on-one programming tutorials or assistance with installing, updating, or migrating your NGINX RTMP setup, feel free to contact me at ojambo.com/contact. I offer custom services tailored to your streaming and development needs.
Final Thoughts
Self-hosting your restream server using open source tools like NGINX with the RTMP module is a rewarding project that saves money and gives you control. Whether you are just starting or want to scale your streaming workflow, this approach can help you broadcast with confidence.
🚀 Recommended Resources
Disclosure: Some of the links above are referral links. I may earn a commission if you make a purchase at no extra cost to you.