
Create a Low Poly Metal Bench in Blender with Python and View it in the Browser
If you’re interested in automating 3D modeling with Python and displaying your creations on the web, this beginner-friendly tutorial is perfect for you!
In this post, you’ll learn how to:
- Create a low-poly metal bench using the Blender Python API
- Bake a texture into a WebP image and embed it into a
.glbfile - Display the final result in a web browser using <model-viewer>
- Run everything using a command-line Python script
This is a great starting point for artists and developers who want to combine scripting, 3D design, and web technologies — without needing to be a Blender expert.
🔧 What You’ll Build
- A simple, low-poly metal bench
- A baked texture (WebP format)
- A
.glbfile with embedded textures - A responsive web viewer using
<model-viewer>
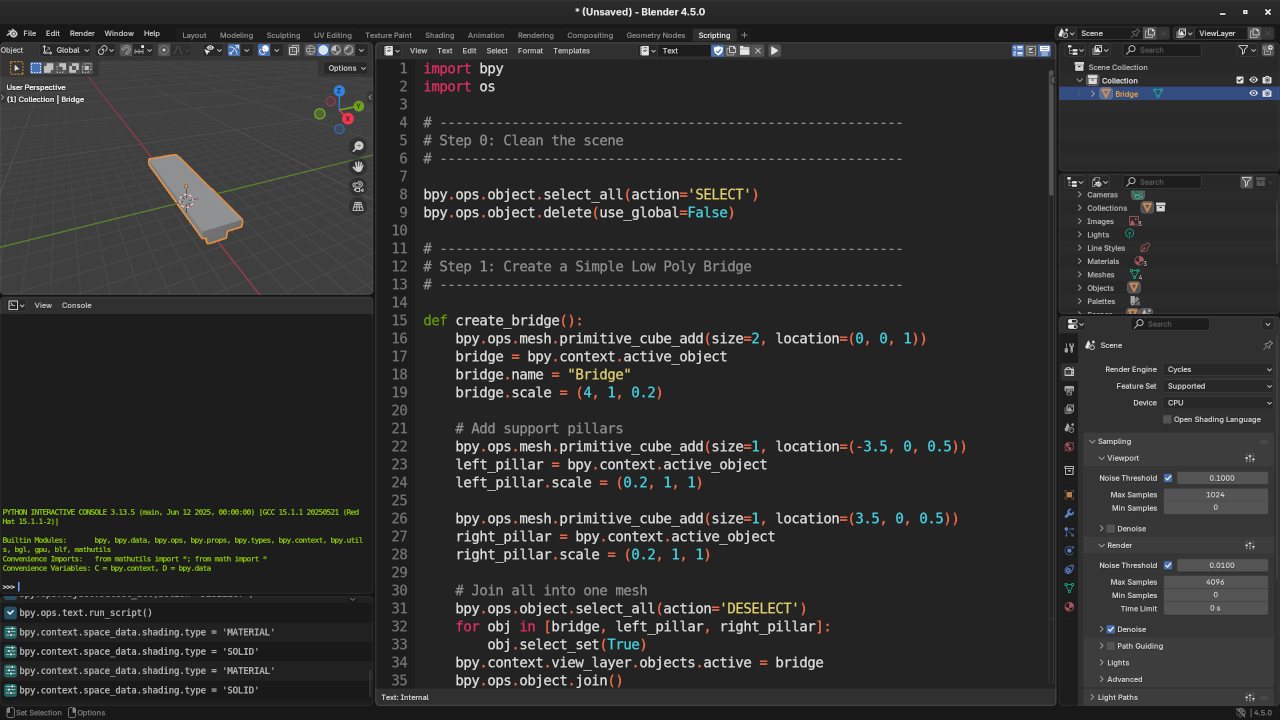
🐍 Python Script for Blender 4.5
We’ll use Blender 4.5’s Python API to generate and export everything. You can paste it directly into Blender’s Scripting tab.
import bpy
import os
# ----------------------------------------------------------
# Step 0: Clean the scene
# ----------------------------------------------------------
bpy.ops.object.select_all(action='SELECT')
bpy.ops.object.delete(use_global=False)
# ----------------------------------------------------------
# Step 1: Create a Simple Low Poly Bridge
# ----------------------------------------------------------
def create_bridge():
bpy.ops.mesh.primitive_cube_add(size=2, location=(0, 0, 1))
bridge = bpy.context.active_object
bridge.name = "Bridge"
bridge.scale = (4, 1, 0.2)
# Add support pillars
bpy.ops.mesh.primitive_cube_add(size=1, location=(-3.5, 0, 0.5))
left_pillar = bpy.context.active_object
left_pillar.scale = (0.2, 1, 1)
bpy.ops.mesh.primitive_cube_add(size=1, location=(3.5, 0, 0.5))
right_pillar = bpy.context.active_object
right_pillar.scale = (0.2, 1, 1)
# Join all into one mesh
bpy.ops.object.select_all(action='DESELECT')
for obj in [bridge, left_pillar, right_pillar]:
obj.select_set(True)
bpy.context.view_layer.objects.active = bridge
bpy.ops.object.join()
return bpy.context.active_object
bridge = create_bridge()
# ----------------------------------------------------------
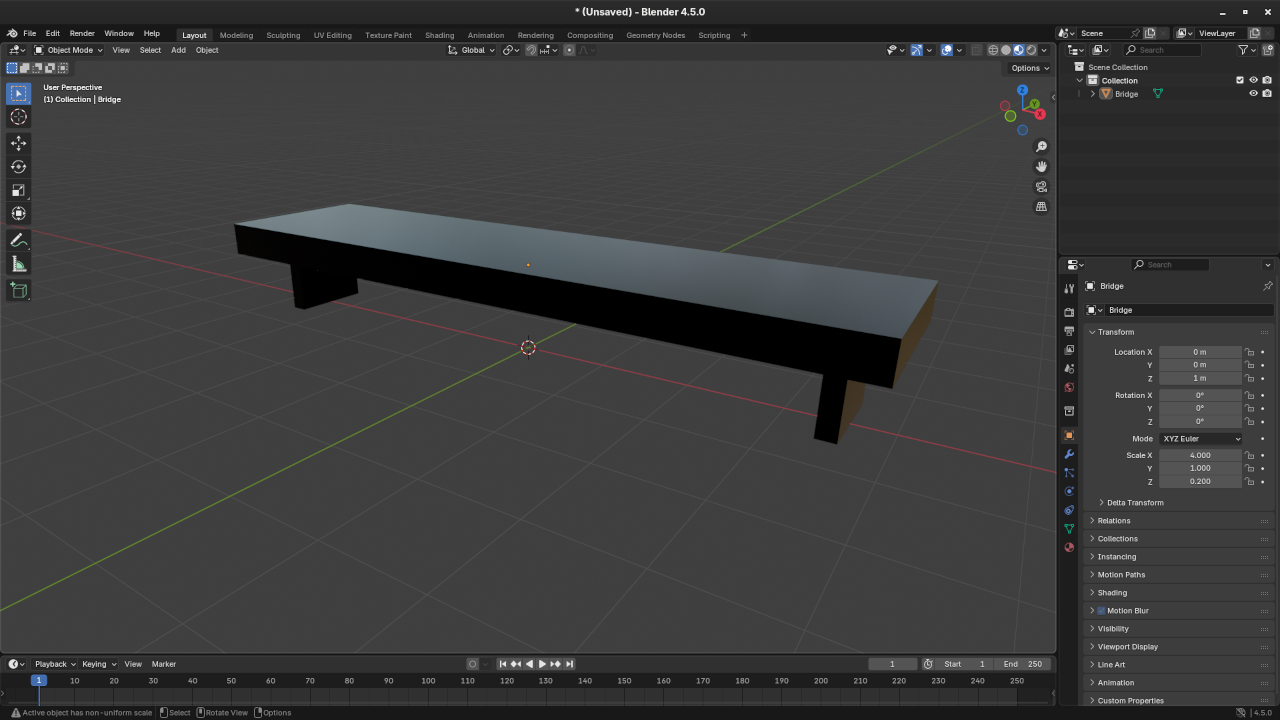
# Step 2: Create a Metal Material
# ----------------------------------------------------------
def create_metal_material():
mat = bpy.data.materials.new(name="Metal_Material")
mat.use_nodes = True
nodes = mat.node_tree.nodes
# Clear all default nodes
for node in nodes:
nodes.remove(node)
# Add Principled BSDF and Output nodes
bsdf = nodes.new(type='ShaderNodeBsdfPrincipled')
output = nodes.new(type='ShaderNodeOutputMaterial')
# Configure BSDF for metal
bsdf.inputs['Base Color'].default_value = (0.3, 0.3, 0.35, 1)
bsdf.inputs['Metallic'].default_value = 1.0
bsdf.inputs['Roughness'].default_value = 0.3
# Link BSDF to Output
mat.node_tree.links.new(bsdf.outputs['BSDF'], output.inputs['Surface'])
return mat
metal_mat = create_metal_material()
bridge.data.materials.append(metal_mat)
# ----------------------------------------------------------
# Step 3: Add UV Map for Baking
# ----------------------------------------------------------
# Set object mode
bpy.ops.object.select_all(action='DESELECT')
bridge.select_set(True)
bpy.context.view_layer.objects.active = bridge
# Enter Edit Mode and unwrap
bpy.ops.object.mode_set(mode='EDIT')
bpy.ops.uv.smart_project(angle_limit=66.0)
bpy.ops.object.mode_set(mode='OBJECT')
# ----------------------------------------------------------
# Step 4: Create Image for Baking
# ----------------------------------------------------------
# Create a new image for baking
output_dir = bpy.path.abspath("//") # Save to current Blender file directory
baked_image = bpy.data.images.new(name="BakedTexture", width=1024, height=1024, alpha=True)
baked_image.file_format = 'PNG' # Use PNG format for compatibility
baked_image.filepath_raw = os.path.join(output_dir, "baked_texture.png")
# Link the image to the material via the Shader Node
nodes = metal_mat.node_tree.nodes
image_node = nodes.new(type='ShaderNodeTexImage')
image_node.image = baked_image
image_node.select = True
nodes.active = image_node # Set this as the active node to ensure it's baked to
# Save the image before baking
baked_image.save()
# ----------------------------------------------------------
# Step 5: Bake the Diffuse to the Image
# ----------------------------------------------------------
bpy.context.scene.render.engine = 'CYCLES'
bpy.context.scene.cycles.device = 'CPU'
bpy.ops.object.select_all(action='DESELECT')
bridge.select_set(True)
bpy.context.view_layer.objects.active = bridge
bpy.ops.object.bake(type='DIFFUSE', pass_filter={'COLOR'}, use_clear=True)
baked_image.save()
# ----------------------------------------------------------
# Step 6: Replace Shader With Baked Texture
# ----------------------------------------------------------
# Remove all nodes and recreate material using baked image
for node in nodes:
nodes.remove(node)
tex_node = nodes.new(type='ShaderNodeTexImage')
tex_node.image = baked_image
bsdf_node = nodes.new(type='ShaderNodeBsdfPrincipled')
bsdf_node.inputs['Metallic'].default_value = 1.0
bsdf_node.inputs['Roughness'].default_value = 0.3
output_node = nodes.new(type='ShaderNodeOutputMaterial')
# Link baked texture
links = metal_mat.node_tree.links
links.new(tex_node.outputs['Color'], bsdf_node.inputs['Base Color'])
links.new(bsdf_node.outputs['BSDF'], output_node.inputs['Surface'])
# ----------------------------------------------------------
# Step 7: Export to .glb with embedded WebP texture
# ----------------------------------------------------------
glb_path = os.path.join(output_dir, "bench.glb")
bpy.ops.export_scene.gltf(
filepath=glb_path,
export_format='GLB',
export_materials='EXPORT',
export_normals=True,
export_image_format="AUTO" # Let Blender decide the image format (usually PNG)
)
▶️ How to Run the Script from the Command Line
Blender allows you to run Python scripts headlessly via the terminal. Here’s how:
- Save your script as
metal_bench.pyin the same folder as your.blendfile (or a new one). - Open your terminal or command prompt.
- Run the script using this command:
blender --background --python metal_bench.py ⚠️ --background runs Blender without launching the UI, perfect for automation.
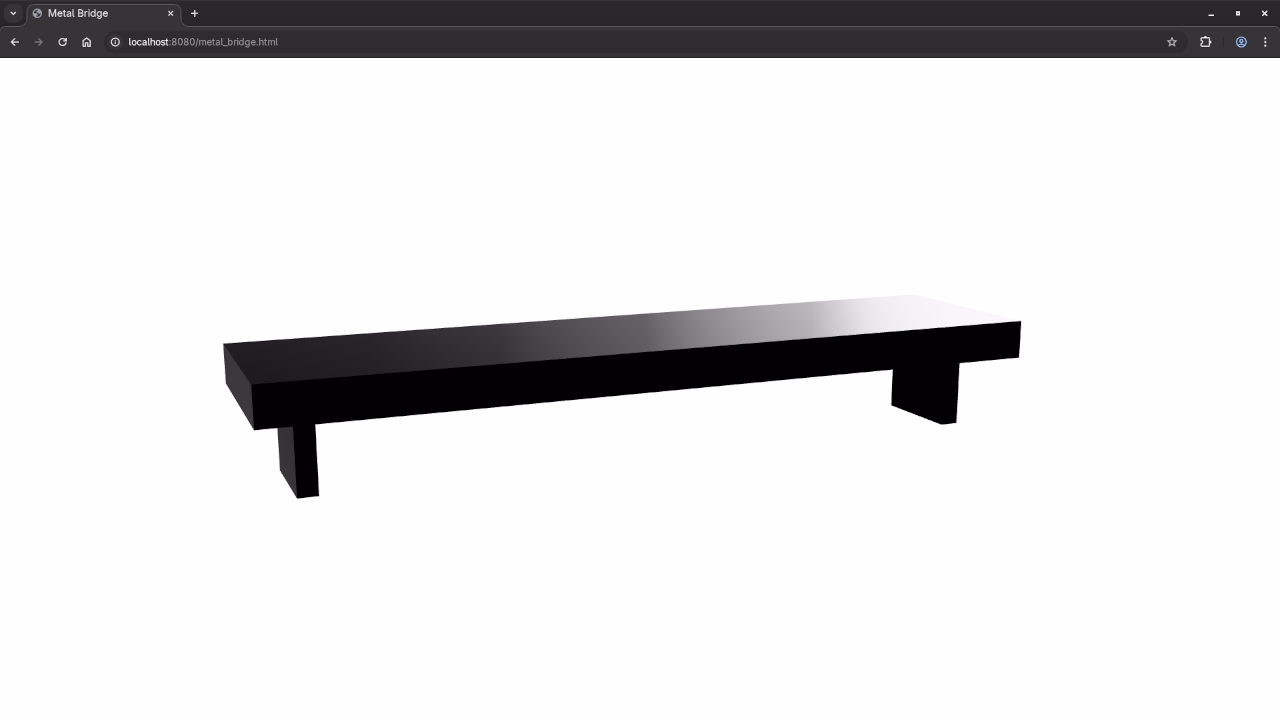
🌐 Display Your Model in the Browser
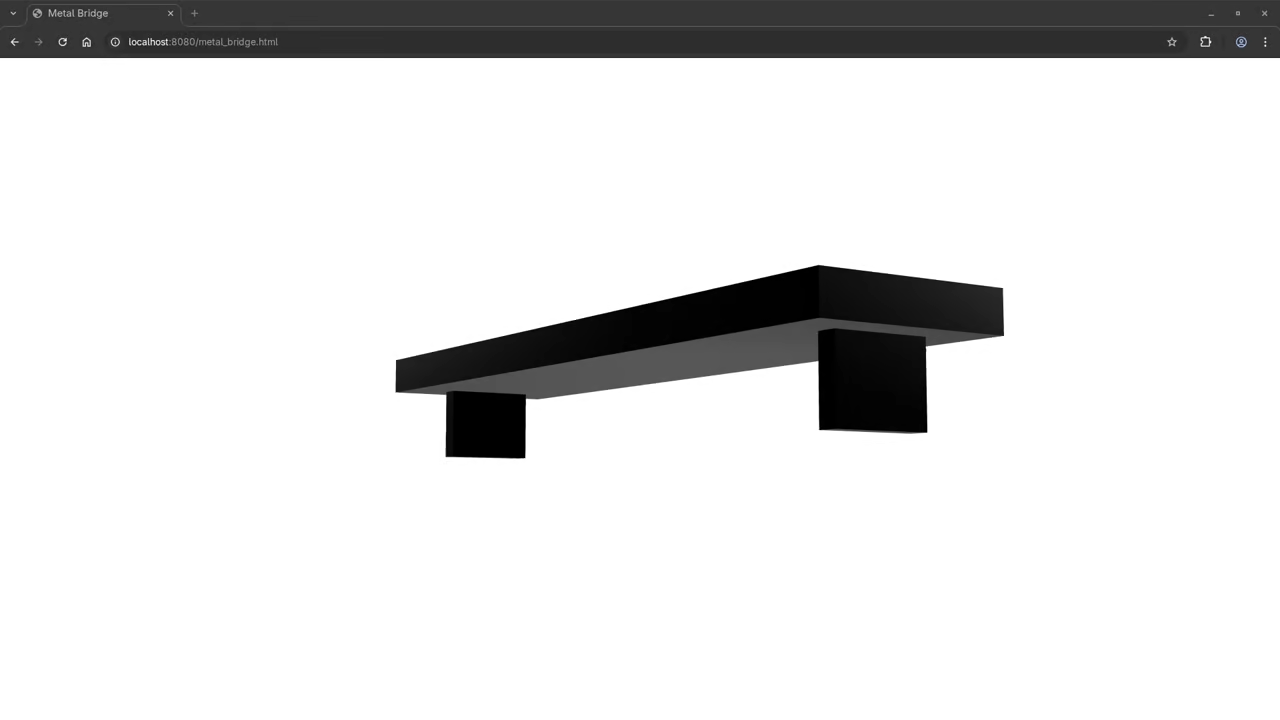
Once you run the script, it generates a bench.glb file. You can display it in any modern web browser using model-viewer:
<model-viewer src="lowpoly-bench.glb"
alt="Low poly metal bench"
auto-rotate
camera-controls
environment-image="neutral"
exposure="1.2">
</model-viewer>
Save this code as an HTML file in the same folder as your bench.glb, then double-click to open it in your browser.
📷 Screenshots & 🎥 Screencast
📚 Learn More with My Books & Courses
📖 My Books:
🎓 Online Course:
👨🏫 1-on-1 Python + Blender Help
Need help customizing scripts, learning Blender’s API, or building your first 3D web app?
🎥 I offer one-on-one online Python tutorials, including Blender scripting:
Contact me to book a session
🏁 Conclusion
This tutorial gives you a full pipeline from Python-powered 3D modeling in Blender to interactive web display using model-viewer. You’ve learned how to script geometry, bake textures, export .glb files, and showcase your model online.
Got questions or improvements? Share your feedback or creations in the comments below!
Happy coding & modeling! 🚀
🚀 Recommended Resources
Disclosure: Some of the links above are referral links. I may earn a commission if you make a purchase at no extra cost to you.